-
Stripe Follow Along NavWeb/JS30 2020. 12. 26. 04:11반응형
미국의 결제 서비스인 stripe 홈페이지에 가보면 다음과 같은 네비게이션 메뉴를 볼 수 있다.

메뉴를 이동하더라도 자연스럽게 연결되면서 컨텐츠에 따라 크기도 알아서 바뀌고 하는
아주 신기한 드롭다운 메뉴인데, 사실은 저 메뉴들이 각각 다 다른 div가 아니라 하나의 div로 구성되어있다.
오늘은 이 신기한 드롭다운 메뉴를 따라서 구현해보는 시간을 갖도록 하자.
며칠전에, 흰 span이 링크들을 따라가면서 위치를 옮기는 효과를 구현했던 것과 꽤 유사하다.
HTML 코드는 대략적으로 다음과 같다.
<nav class="top">
  <div class="dropdownBackground">
    <span class="arrow"></span>
  </div>

  <ul class="cool">
    <li>
      <a href="#">About Me</a>
      <div class="dropdown dropdown1">
        <div class="bio">
          <img src="https://logo.clearbit.com/wesbos.com">
          <p>Wes Bos sure does love web development. He teaches thin ...</p>
        </div>
      </div>
    </li>
    ...
보시다시피 드롭다운 메뉴가 nav 태그 안에 포함되어있고,
메뉴 안의 내용들은 ul 태그 안의 li 태그들로, 메뉴의 흰 배경에 해당하는 div는
'dropdownBackground'라는 클래스를 가지는 단 하나의 div로 구현한다.
(위에 쪼끄만 삼각형은 'arrow'라는 클래스를 가지는 span 태그로 구현)
우선, 드롭다운 메뉴의 트리거들(선택 가능한 목록)과 흰 배경, 그리고 네비게이션 바 전체를 변수에 담는다.
그리고 마우스를 갖다댔을 때와 마우스를 다시 밖으로 뺐을 때 실행시킬 함 수 두 개를 선언한다.
const triggers = document.querySelectorAll('.cool > li');
const background = document.querySelector('.dropdownBackground');
const nav = document.querySelector('.top');

function handleEnter() {}
function handleLeave() {}

triggers.forEach(trigger => trigger.addEventListener('mouseenter', handleEnter));
triggers.forEach(trigger => trigger.addEventListener('mouseleave', handleLeave));
그 다음에 함수 내용을 채워넣기 전에, 일단 미리 작성된 CSS를 살펴보자.
.dropdown { opacity: 0; position: absolute; overflow: hidden; padding: 20px; top: -20px; border-radius: 2px; transition: all 0.5s; transform: translateY(100px); will-change: opacity; display: none; } .trigger-enter .dropdown { display: block; } .trigger-enter-active .dropdown { opacity: 1; }trigger-enter와 trigger-enter-active 클래스는 애니메이션을 위한 클래스라고 생각하면 되는데,
보면 display와 opacity에 관한 내용을 각각 다른 클래스에 집어넣은 것을 볼 수 있다.
코드가 그리 길지도 않은데, 왜 굳이 두 개를 따로 다른 클래스에 넣어 놓은 것일까?
그 이유는, display를 none에서 block으로 만드는 것과 동시에
opacity를 0에서 1로 바꾸는 애니메이션이 동작하지 않기 때문이다.
실제로 둘을 하나의 클래스에 집어넣어서 애니메이션을 실행시켜보면
opacity에 관한 애니메이션이 전혀 동작하지 않는 모습을 확인할 수 있다.
그래서 둘을 각자 다른 클래스에 집어넣고 두 클래스를 함께 붙여주는 방식을 많이 사용하고,
리액트나 앵귤러와 같은 라이브러리(프레임워크)에서도 이러한 방식으로 애니메이션을 구현한다고 한다.
이제, handleEnter와 handleLeave 함수를 채워넣어보자.
function handleEnter() {
  this.classList.add('trigger-enter');
  setTimeout(() => this.classList.add('trigger-enter-active'), 150);
  background.classList.add('open');
}

function handleLeave() {
  this.classList.remove('trigger-enter', 'trigger-enter-active');
  background.classList.remove('open');
}
handleEnter 함수를 보면, 먼저 trigger-enter 클래스를 붙여서 display를 block으로 만들고나서
0.15초 후에 trigger-enter-active 클래스를 붙여서 opacity를 1로 만드는 애니메이션을 동작시킨다.
background에 붙여준 open이라는 클래스는, 흰 배경의 opacity를 0에서 1로 바꿔주는 클래스이다.
마우스를 뗄 때에는 opacity 애니메이션을 주지 않고, 둘을 그냥 함께 없애버린다.
참고로 여기서의 this는 우리가 마우스를 갖다대는, 드롭다운 메뉴가 펼쳐지는
네비게이션 바의 컨텐츠들(li = list item)을 의미한다. 위에서 'triggers'라는 변수에 담은 애들이다.
즉, this가 mouseenter 이벤트가 발생하는 target을 가리키기 때문에
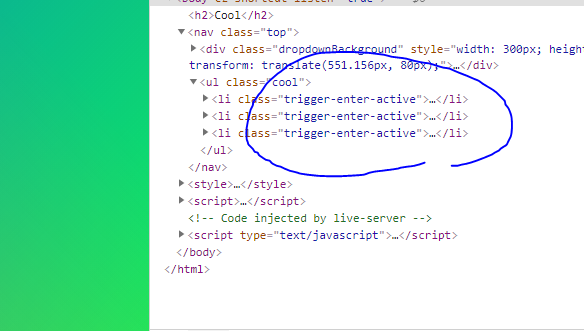
각 triggers에 마우스를 올릴 때마다 콘솔에 this를 출력해보면 다음과 같이 각각 다른 애들이 출력된다.

추가로, 만약 setTimeout의 콜백함수에서 화살표 함수를 사용하지 않는다면,
this가 window 객체를 가리키게 되니 주의하길 바란다.
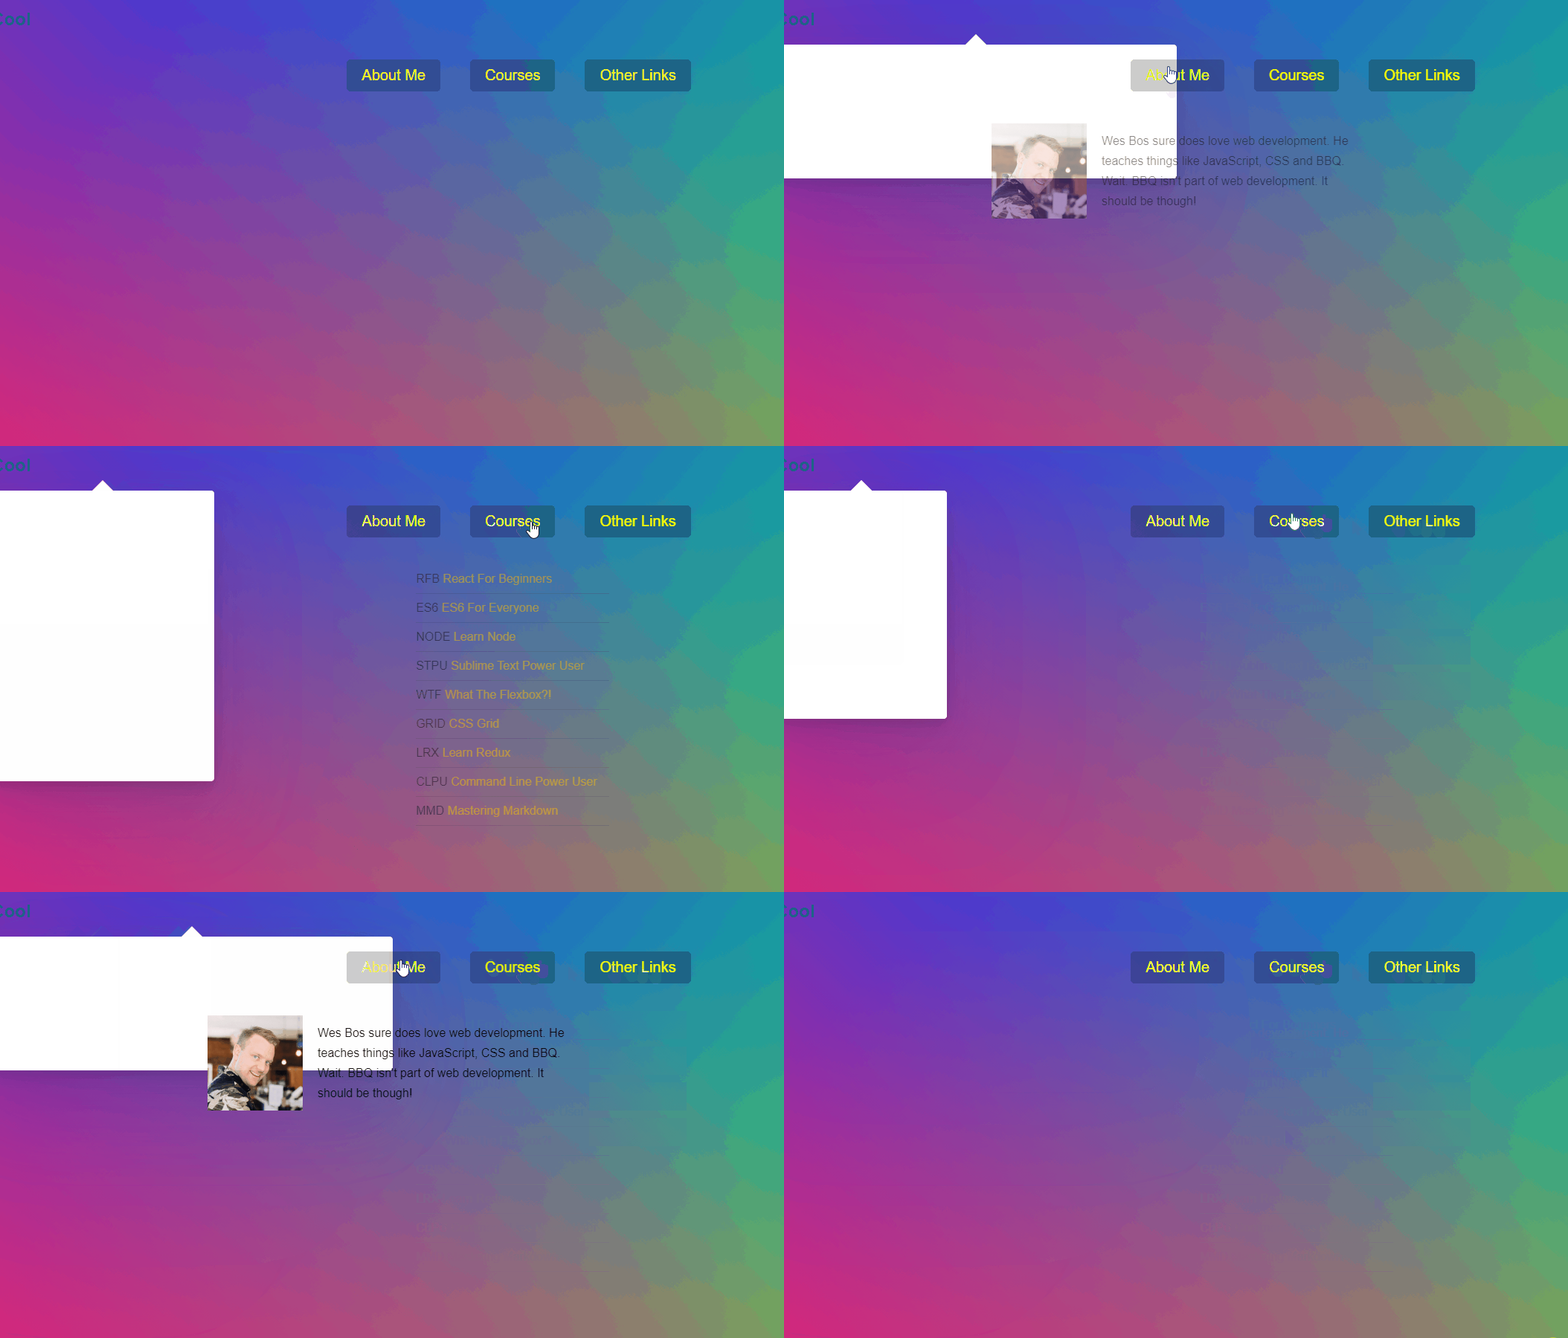
여튼. 위와 같이 코드를 작성하고나면, 다음과 같이 드롭다운 메뉴가 동작하게 된다.

handleEnter 함수에 내용을 추가해보자.
이제 저 흰 배경이 각 드롭다운 메뉴의 컨텐츠의 크기에 맞게 width와 height를 바꾸기도 하고
컨텐츠의 위치에 맞게 자신의 위치를 바꾸기도 해야 한다.
이를 위해서, 우선 각 드롭다운 메뉴를 변수에 담는 것부터 시작한다.
function handleEnter() {
  this.classList.add('trigger-enter');
  setTimeout(() => this.classList.add('trigger-enter-active'), 150);
  background.classList.add('open');

  const dropdown = this.querySelector('.dropdown');
  const dropdownCoords = dropdown.getBoundingClientRect();
}
다른 변수들과 다르게 얘는 마우스를 갖다대고 나서 querySelector로 잡아주는 이유가 뭐냐면,
처음에 페이지가 로딩되었을 때와 우리가 마우스를 갖다댈 때 드롭다운 메뉴의 위치에
어떤 변동사항이 생기게 될지 알 수 없기 때문이다.
홈페이지의 다른 요소들 중에 크기가 바뀐다거나 하는 요소가 있을 수 있는데
그렇게 되면 처음에 잡아놓은 위치와 다른 위치로 이동되는 경우가 생길 수도 있다.
이를 대비하여, 마우스를 갖다대고 나서 dropdown 변수를 잡아주기로 한다.
그리고나서, 위치와 크기를 한 번에 잡아주기 위해 getBoundingClientRect 메소드를 사용해주었다.
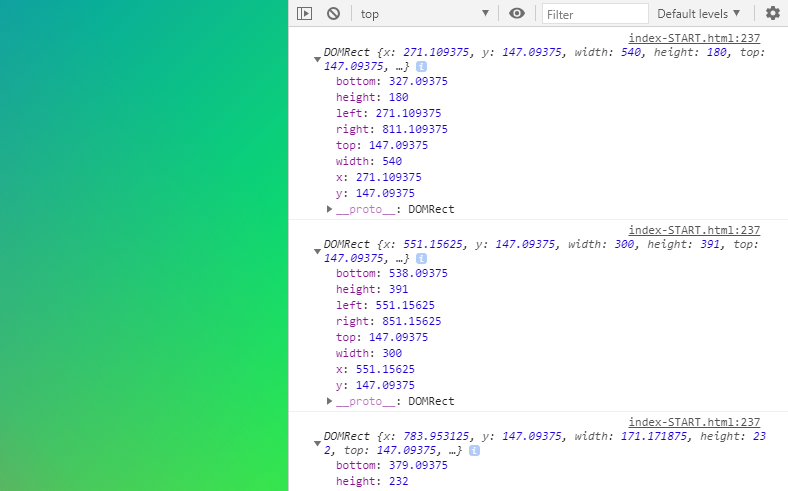
각 triggers에 마우스를 올릴 때마다 getBoundingClientRect를 출력해보면
각 컨텐츠들의 크기와 위치가 잘 출력되는 모습을 확인할 수 있다.

이제 각 드롭다운 메뉴의 width와 height, top과 left를 잡아놓고
흰 배경이 그에 맞게 알아서 바뀌도록 코드를 작성해 줄 차례이다.
function handleEnter() {
  this.classList.add('trigger-enter');
  setTimeout(() => this.classList.add('trigger-enter-active'), 150);
  background.classList.add('open');

  const dropdown = this.querySelector('.dropdown');
  const dropdownCoords = dropdown.getBoundingClientRect();

  const coords = {
    height: dropdownCoords.height,
    width: dropdownCoords.width,
    top: dropdownCoords.top,
    left: dropdownCoords.left,
  };

  background.style.setProperty('width', `${coords.width}px`);
  background.style.setProperty('height', `${coords.height}px`);
  background.style.setProperty('transform', `translate(${coords.left}px, ${coords.top}px`);
}
이렇게 하고 나면, 각 컨텐츠의 크기에 맞게 흰 배경의 크기와 위치가 자유자재로 변하는 것을 확인할 수 있다.
참고로, 위에서 말하지 않았던 내용 중에 추가할 만한 내용이 있는데
바로 클래스를 trigger-enter와 trigger-enter-active 두 개로 나눠서 사용하는 또 다른 이유에 관한 것이다.
trigger-enter가 되기 전에는 display가 none인 상태이기 때문에 div가 형체를 가지지 않는다.
그러면, 미리 getBoundingRect를 사용해서 계산을 하는 것 역시 불가능해진다.
그래서 display를 먼저 block으로 만들어서 getBoundingRect를 사용할 수 있게 만들어주고,
0.15초 후에 opacity를 1로 만들어주도록 하면 애니메이션도 함께 가져갈 수 있게 되는 것이다.

width와 height만 setProperty 했을 때 
top과 left까지 setProperty 했을 때
위의 이미지에서도 확인할 수 있듯이, 문제가 발생했다.
정확히는, 문제가 발생하는 경우가 생길 수 있다.
만약 네비게이션 바 위에 홈페이지의 타이틀을 넣거나 하게 되면
네비게이션 바가 전체적으로 아래로 내려오게 되는데,
드롭다운 메뉴 또한 네비게이션 바에 포함되어있기 때문에
걔네 또한 전체적으로 내려가게 되면서 약간 위치가 어긋나게 된다.
이를 해결하기 위해서는, 네비게이션 바의 top과 left를 구해서
드롭다운 메뉴의 top과 left에서 걔네들을 빼주면 된다.
function handleEnter() {
  this.classList.add('trigger-enter');
  setTimeout(() => this.classList.add('trigger-enter-active'), 150);
  background.classList.add('open');

  const dropdown = this.querySelector('.dropdown');
  const dropdownCoords = dropdown.getBoundingClientRect();

  const coords = {
    height: dropdownCoords.height,
    width: dropdownCoords.width,
    top: dropdownCoords.top - navCoords.top,
    left: dropdownCoords.left - navCoords.left,
  };

  background.style.setProperty('width', `${coords.width}px`);
  background.style.setProperty('height', `${coords.height}px`);
  background.style.setProperty('transform', `translate(${coords.left}px, ${coords.top}px`);
}
끝난 것 같지만, 아직 발생할 수 있는 문제점이 한 가지 더 있다.
만약 네비게이션 바를 마우스로, 좌우로 빠르게 샤샤샥 훑게 되면
0.15초가 지나서 trigger-enter-active가 add되기 전에 remove하는 코드가 먼저 실행되는 경우가 생길 수 있다.
그러면 remove하는 코드가 먼저 실행되고나서 add가 되기 때문에, 우리가 드롭다운 메뉴에서 마우스를 떼고 나서도
trigger-enter-active 클래스가 add 되기만 하고 remove 되지 않아서 여전히 남아있게 된다.

그래서, trigger-enter 클래스를 포함하고 있을 때만 trigger-enter-active 클래스를 붙여주겠다는
if문을 넣어주면 이런 불상사를 사전에 예방할 수가 있게 된다.
(trigger-enter 클래스는 마우스를 떼자마자 사라지고,
마우스를 대자마자 적용되기 때문에 add와 remove가 시간차로 적용될 수가 없다.
즉, " trigger-enter 클래스가 적용된 상태이다 = 마우스를 갖다대고 있는 상태이다
trigger-enter 클래스가 사라졌다 = 마우스를 뗀 상태이다 ")
그래서, 다음과 같이 마우스를 빠르게 움직여도 충돌이 일어나지 않게 만들어줄 수가 있다.

전체 자바스크립트 코드
<script>
  const triggers = document.querySelectorAll('.cool > li');
  const background = document.querySelector('.dropdownBackground');
  const nav = document.querySelector('.top');

  function handleEnter() {
    this.classList.add('trigger-enter');
    setTimeout(() => this.classList.contains('trigger-enter')
      && this.classList.add('trigger-enter-active'), 150);
    background.classList.add('open');

    const dropdown = this.querySelector('.dropdown');
    const dropdownCoords = dropdown.getBoundingClientRect();
    const navCoords = nav.getBoundingClientRect();

    const coords = {
      height: dropdownCoords.height,
      width: dropdownCoords.width,
      top: dropdownCoords.top - navCoords.top,
      left: dropdownCoords.left - navCoords.left,
    };

    background.style.setProperty('width', `${coords.width}px`);
    background.style.setProperty('height', `${coords.height}px`);
    background.style.setProperty('transform', `translate(${coords.left}px, ${coords.top}px`);
  }

  function handleLeave() {
    this.classList.remove('trigger-enter', 'trigger-enter-active');
    background.classList.remove('open');
  }

  triggers.forEach(trigger => trigger.addEventListener('mouseenter', handleEnter));
  triggers.forEach(trigger => trigger.addEventListener('mouseleave', handleLeave));
</script>
참고로 위에서는 trigger-enter-active 클래스를 붙일 때 그냥 if문을 사용했지만
이렇게 '&& 연산자(논리 and 연산자)'를 사용해서도 if문을 역할을 하게 만들어줄 수 있다.
반응형'Web > JS30' 카테고리의 다른 글
Video Speed Controller UI (0) 2020.12.27 Click and Drag to Scroll (0) 2020.12.26 Event Capture, Propagation, Bubbling and Once (0) 2020.12.24 Sticky Nav 🩹 (0) 2020.12.23 📢 Speech Synthesis 🔊 (0) 2020.12.23